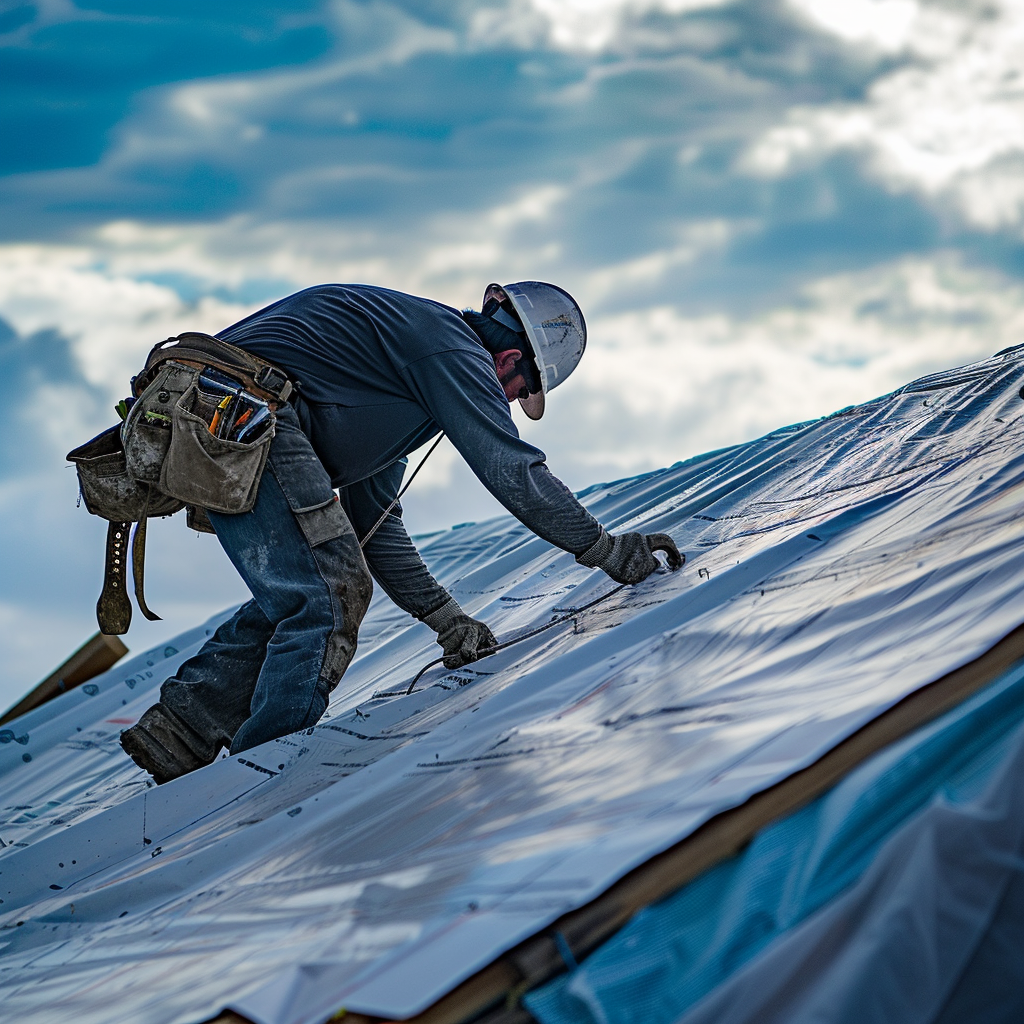
In South Florida, where the weather can turn on a dime, knowing how to secure a tarp on a roof is not just handy,it’s essential. As part of our daily operations at our restoration company, we’ve mastered this skill through countless emergency calls post-storm. Our experience has taught us that proper preparation and technique are key to protecting homes from further damage when the unexpected hits.
When You Might Need to Tarp Your Roof
Discussing Common Scenarios That Necessitate Tarping a Roof
In our line of work, we’ve seen various situations where homeowners urgently need to tarp their roofs. The most common scenario is in the aftermath of hurricanes or severe storms, where wind and debris can cause significant damage. Other times, issues like sudden leaks or damages that occur during ongoing construction projects require immediate action to prevent water from infiltrating the home and causing further interior damage.
Tarping acts as a temporary but essential barrier against these elements, offering crucial protection until permanent repairs can be made. In South Florida’s unpredictable climate, being prepared for such eventualities is not just advisable,it’s indispensable for safeguarding your property against escalating harm.
Choosing the Right Tarp for Your Roof
Tips on Selecting Appropriate Materials and Sizes for Different Roofing Needs
When it comes to securing a tarp on your roof, not all tarps are created equal. The material of the tarp is paramount; heavy-duty polyethylene tarps are preferred due to their water resistance and durability against harsh weather conditions. Size also matters,selecting a tarp that adequately covers the damaged area plus an additional margin ensures complete protection.
It’s crucial to consider UV resistance as well, especially in South Florida where sun exposure can degrade lesser materials over time. A good rule of thumb is to opt for a thicker, more robust tarp with reinforced corners and rust-resistant grommets for secure anchoring.
Understanding Weight and Thickness Options
Tarps come in various weights and thicknesses, each suited to different levels of severity when it comes to damage. Lighter options might suffice for minor leaks, while heavier more substantial ones will be required to withstand the aftermath of serious storms such as hurricanes. Making an informed choice about weight thickness based on the extent of roof damage and the current weather forecast can make the difference between a temporary fix holding up until professional repairs are made and failing prematurely, leaving the property vulnerable.
Step-by-Step Guide: How to Secure a Tarp on a Roof
Safety Precautions:
- Wear Protective Gear: Always wear non-slip boots, gloves, and safety goggles.
- Check Weather Conditions: Ensure you’re working in safe weather – avoid windy or rainy conditions.
- Use a Sturdy Ladder: Make sure the ladder is stable and have someone spot you if possible.
Necessary Tools
- Heavy-duty polyethylene tarp
- Measuring tape
- Nails or roofing staples
- Hammer or staple gun
- 2×4 wooden boards for securing edges
- Utility knife for trimming
Installation Steps:
- Measure the Area: Determine the extent of roof damage and measure to ensure your tarp covers this area plus an additional margin around it.
- Positioning The Tarp: Unfold your tarp carefully over the damaged area, ensuring that it lies flat against the roof surface without any wrinkles that could collect water.
- Securing The Edges: Lay 2×4 wooden boards along the outer edges of your tarp.
Wrap excess material from the sides of the tarp around these boards, then nail or staple them securely into place through both layers. This method not only secures but also tightens making it less likely to billow under strong winds.
- Anchoring Corners: Cut small holes at each corner board and pass a durable rope through. Tie it off securely, providing extra anchorage and stability during high-wind events.
- Trimming Excess Material: Use a utility knife to trim away unnecessary portions, preventing potential tripping hazards and accumulation of moisture underneath.
- Final Inspection: Walk around and inspect the installation to make sure there are no loose end points where water might penetrate. Validate that all nails and staples are firmly attached to hold up under anticipated weather conditions.
Professional vs DIY Tarp Installation
Comparing Do-It-Yourself Efforts with Hiring Professionals for the Job
When faced with the need to secure a tarp on your roof, homeowners might consider whether to tackle the task themselves or call in professionals. DIY efforts can be cost-effective and offer immediate action, especially when damage occurs outside of typical business hours. However,
the risks associated include potential personal injury as well as an inaccurate installation that fails to protect the property effectively.
On the other hand, hiring a professional company like ours ensures the job is done safely and correctly the first time. Our team is equipped to handle the challenges that come along with securing tarps in the high winds and unpredictable weather patterns of South Florida. Additionally, we possess the tools and materials necessary to ensure a durable, long-lasting roof tarping solution, protecting your home until permanent repairs are made.
Highlighting Potential Risks and Benefits of Each Approach
DIY Installation:
- Benefits: Immediate response; potentially lower upfront costs.
- Risks: Safety hazards; risk of improper installation leading to further damage or ineffective protection.
Professional Installation:
- Benefits: Expertise in safe, effective tarp placement; higher quality materials; peace of mind knowing it’s done right.
- Risks: Cost may be higher than doing it yourself (though this is offset by reduced risk of additional damages).
Ultimately, the decision between the route taken depends on the homeowner’s comfort level and physical ability to assess the situation and the urgency of repair needed. Regardless of choice, it is important to prioritize safety and effectiveness above all else, ensuring a temporary measure doesn’t result in more complex, expensive issues down the line.
At J&R Restoration, we go way beyond roof tarping, helping clients with mold remediation, water damage restoration, smoke and fire damage restoration, and more. Contact us today to get started.
